Saturday, November 29, 2014

Cat fez


Timey-wimey kitty witty.  Lounging in a pile of clean laundry.

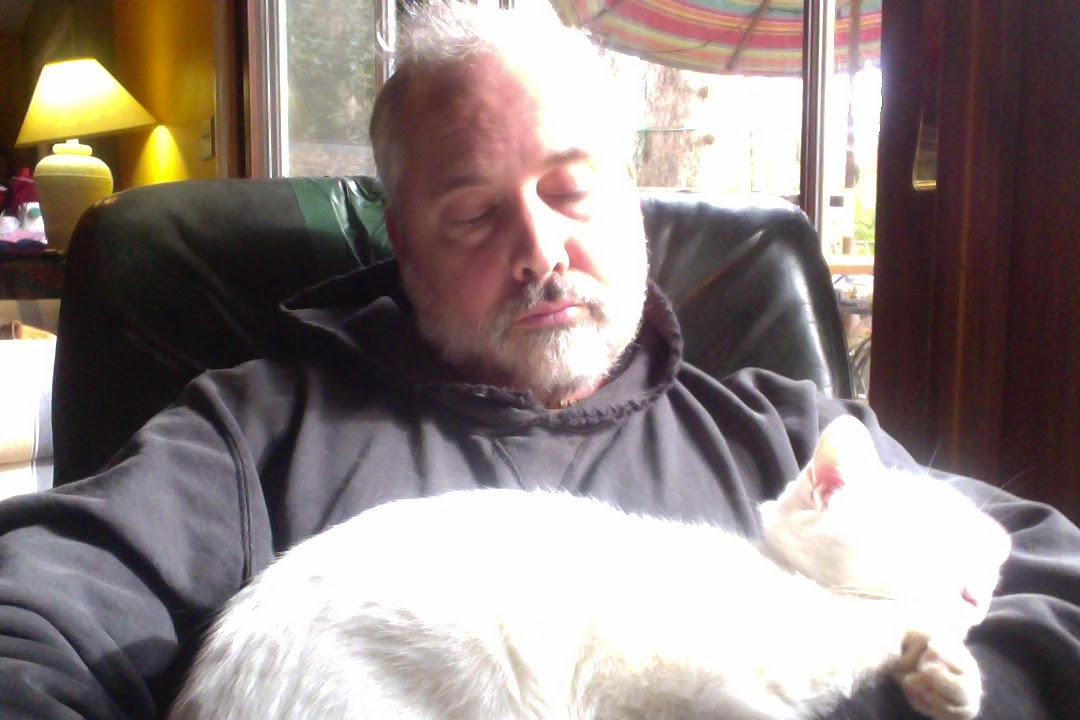
Has this ever happened to you?   A beloved companion sleeps in your lap.  You look down at her and make this realization:
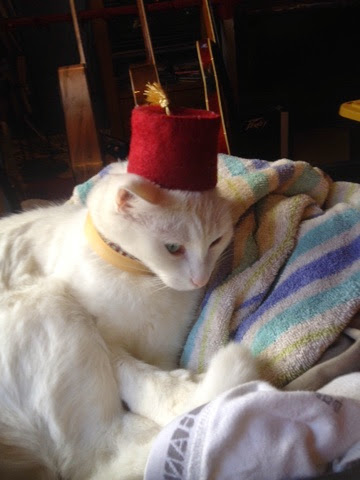
What this sleeping cat needs is a fez.
You realize that such an impulsive cat accessory may not be imminently available.  But the internet doth provide. However, if you don't want to wait for shipping from Australia, a reasonably priced altenative is available if you are reasonably crafty.

You will need:
Supplies
A paper coffee cup
A scrap of felt in the color of your preference (I used a traditional maroon)
A small tassel, or some yarn to make your own tassel.
A few scraps of paper or cardboard.
A small bit of stretchy material, unless your cat likes to wear hats.  It should match your cat, if possible. (I had some white stuff around, which matches my cat beautifully)

Equipment:
Ruler
Pen, pencil, or marker
Scissors
A hot glue gun
Darning needle to attach tassel

Instructions.
Get yourself a cup of coffee, tea or whatever.  It's really the paper cup that you want.  If you get a styrofoam cup, it still could work if you use school glue instead of hot glue.  Your gratification will be delayed, though ):
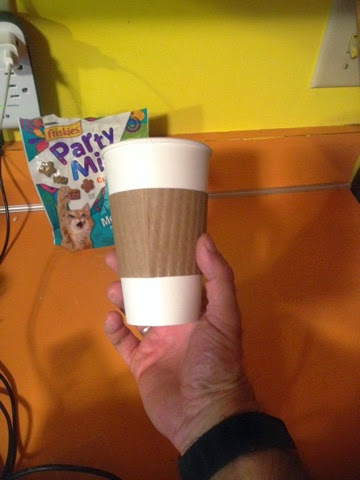
Ah, caffeine.  Empty and wash and dry it before proceeding.

Remove the zarf (the paper sleeve, yes, that's what it's called).
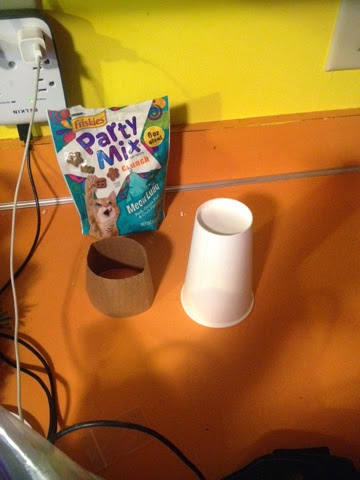
The Party Mix is to reward the cat's patience.
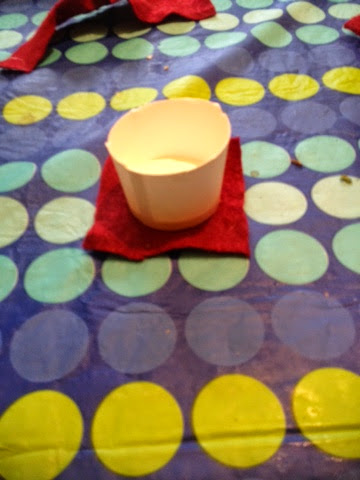
Measure the depth of the hat and mark where you wish to cut.  I made mine about 2".  
2 inches seems like a good size for a cat fez.
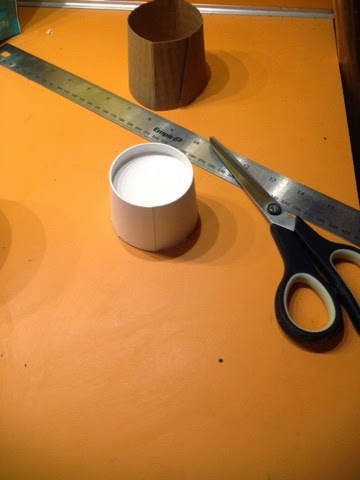
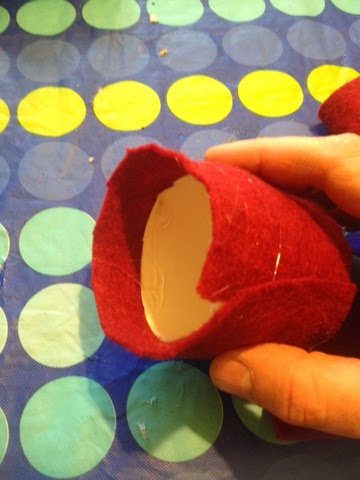
Cut it out with the scissors.
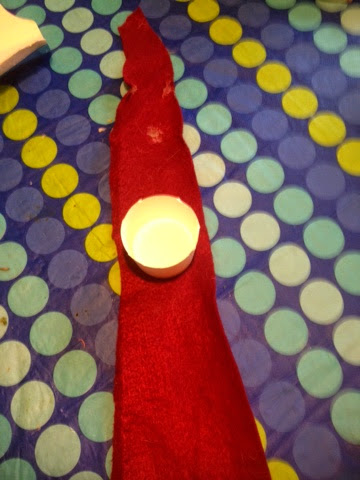
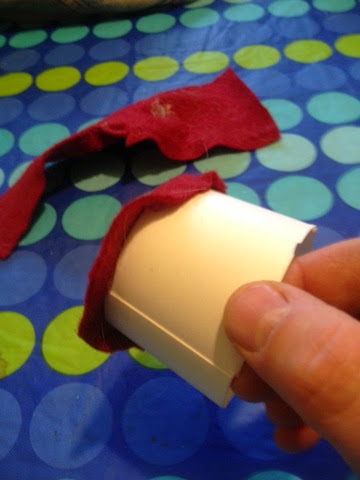
Now get the felt out, and make sure it covers the top of your fez form (coffee cup) with a slight overlap. 
Looking good!
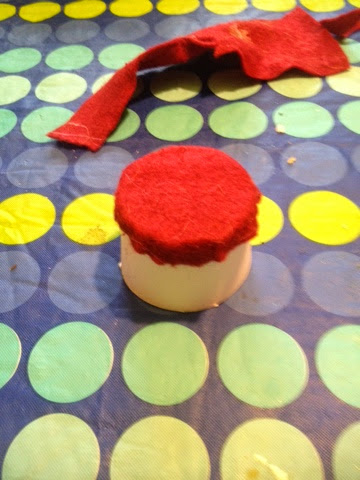
Add a bead of hot glue to the edge of the form and press down onto the felt.  Trim away the excess so you have a square slightly larger than the top.
Bead of hot glue at the top
Press the cup onto the felt.

Now trim away the excess so it make a circle about a 1/4 to 1/2 inch larger than the top of the cup.

Glued to the felt and trimmed.

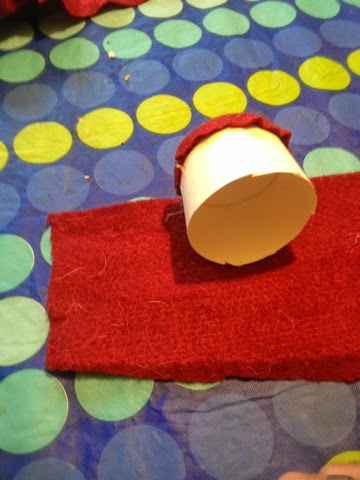
Now work you're way around the top, gluing down that edge.
Hot glue, hot glue.


Ready for the next step
Now you can start gluing the edges to the top. Line up the edge of the felt with the top.  Start gluing the top and edge and work your way around.
Work it around, glue, keep working it.

And then,
Rolling it up and gluing all the way.

Keep working until you get all the way around.


Trim the excess to leave a margin of about a half inch
 Now glue the edge down to the inside of the form
It's starting to look fezzy, isn't it?
I happened to have a nice gold tassel laying around. You can make a yarn tassel, or leave it with no tassel.  I'm not gonna tell you how to live your life. 

It's time to add the tassel.
Poke a hole through the center of the lid to thread the tassel through.  Wrassle that tassel.  That's what I had to do.  Once it's through, you can attach it with a dab of hot glue.  I used a small scrap of construction paper to smash it all together.
A dab will do ya!
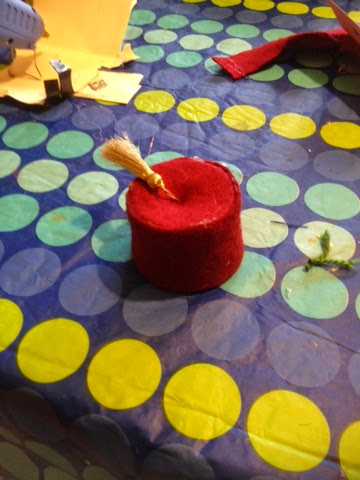
It's basically a fez now.

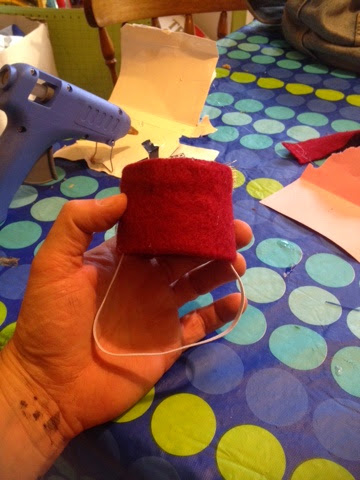
The last thing you need to do is to add the stretchy band. This will help keep the hat on kitteh's head. Don't make it too small, you don't want to moosh kitteh's bwain. Use hot glue/paper scraps.

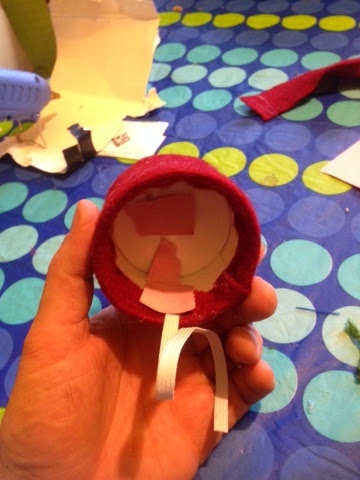
See how the scraps of paper help moosh the glue down?


Et voila!

So excited I might pee at this point.

Only thing left to do is try it on.  Please don't hurt your cat when you do this, and reward her/him with treats.  Most cats are not really fans of wearing little hats. 


So sexy.

Really, this is an easy project that took me much less time to execute than to blog about.  I will post about how to make your own human-sized fez soon. ;)
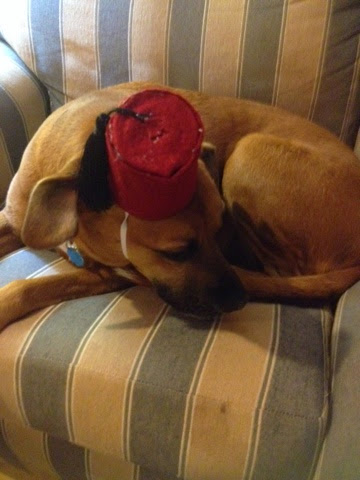
Addendum:  What do you do with the other half of the paper cup?  Dog fez. 
On the right, cat fez.  On the left, a slightly larger dog fez

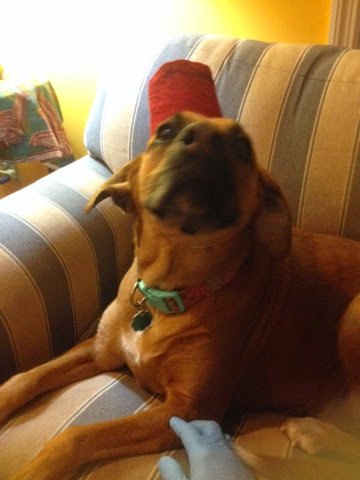
Isn't she lovely?  Don't be shy!

So purty!

Friday, November 28, 2014

Sea glass backsplash

My home, for what it's worth, was built in 1978.  The stove that was in the house when we bought it was, I'm pretty sure, original.  It had a microwave that had dials and a flip clock.  The stove had developed several issues: dodgy burners, inaccurate knobs that were illegible, the oven which would select whatever temperature it wished to bake.  So I had a modest epiphany that it was actually possible to BUY A NEW STOVE.  Yes, believe it or not it took me about two years to make this realization, because my mind is pretty well set on repairing, upcycling, or just making whatever it is I need in my life, as well as stuff that I don't need but just find cool or interesting.

So, I bought a new stove/oven.  Which has a glass top and a great big oven, but then I didn't have a microwave for a while, and I had a big ugly space where the old ugly microwave used to be.  There was some of the old, original wallpaper underneath, which was earthtoney (blerg) and uninspiring (to me).

Then, my luddite self succumbed to my modern self, and I got a new microwave to go over the stove.  It sat in the kitchen for a while before I decided I needed to install it.  One concern on my mind was what to do with that little bit of wall space under the microwave and over the stove.  My mind said "backsplash".  But what to put there?  I was wary of having to cut tile or glass for such a small space. Then two wonderful women inspired me.  First, my friend Christina said "Why don't you use some of that sea glass you've been making?" Why don't I indeed?  Another modest epiphany.
This part took me quite a while.  I don't know how long but over an hour I'm sure.
Then, one of my dear Peace Corps friends, Nicole, posted a tutorial on her blog on how to use river rock for a very similar project.  So following Nicole's instructions, these are the results:

Here it is after setting all the glass tiles, but before grouting.  Break time
After the thin-set mortar, the grout.  I went with white.
Ta-daa!  Now I will wait a week to seal it and caulk the edges.

Sunday, November 16, 2014

Recycled pallet guitar stand

I've had a problem with having enough space to hold my guitars. I also have a backstock of some wooden pallets.  So I thought I'd introduce my two problems to each other, and a little Pinterest research (which led me here) gave me the measurements I needed.  A few jigsaw and circular saw cuts, a few deck screws, and a bunch of hot glue and felt yielded this:
Red felt I had left over from making my fez

Add caption

Electric, acoustic, bass? They all fit!

Thursday, November 6, 2014

Upcycled unicorn

I went to the Goodvation Willarmy the other day and some person with a unicron fetish had apparently dropped off a bunch of stuff.  I bought the item on the left and modified it to say "I just have to believe in myself". 

Sunday, December 29, 2013

More lanterns

I've been busy crafting during this Xmas season and break from academic duties.  This year I've been giving out a lot of my can lanterns, and making a bunch more.  I've moved my can stamping rig inside, which consists of a sawhorse with a dowel clamped to it, and a desk light.  To improve my precision and save my fingers, I've taken to keeping the nail I stamp with in a vise-grip.

I really like using painted cans, from exotic foodstuffs like El Pato sauces, coconut milk and other Asian delicacies. 
Some tasty sauce in a beautiful little package
All lit up

I've also tried going back to working with stencils, starting with one of my favorite subjects, giant monsters. 
Godzilla and King Ghidorah battle at the Cafe du Monde
I have a couple of Cafe du Monde coffee and chicory cans laying around,  which seem to lend themselves to some monster mayhem, using stencils and the painting on the can.

Godzilla descends upon the French Quarter

Sunday, September 22, 2013

PBLTASBMLM

I like to joke with my girls about our secret family recipe for ice. They say, "What is it, water?" And I say the secret ingredient is cold.
Today I decided to scratch an itch I've had for a week now,  
I made myself a BLT using my favorite Ingredients. 
Bacon:  I've found that the best bacon can be had from the deli case at my local Kroger. And it's less expensive than the packaged stuff. It's thick cut and I like the peppered variety though I get some of the regular as well for my daughter who has a narrow palate (she's a very picky eater). 

So peppered bacon, some choice tomatoes, I use the spring mix for my lettuce, ripe avocado, and spicy brown mustard and light mayo. Mmmmmmmm good!

Thursday, August 8, 2013

Chicken teriyaki


I like to cook and eat.  One of my favorite things to cook and eat is chicken teriyaki.  I used to frequent a place in Corvallis when I was in school at Oregon State because it was right near my building and the chicken teriyaki bowl was delicious.  It was years before I figured out one of the secrets. 

I’m mostly self-taught as a cook, but I still feel a little dumb not realizing that the secret to the tasty rich chicken was using thighs instead of breast meat.  Perhaps they also used a little vitamin MSG as well. 

I like the chicken teriyaki bowl because it’s represents a one-bowl three-tiered food pyramid affair.  The rice makes up the grain, then the steamed vegetables, with the chicken and other savory bits on top.  Here’s what I do:

The rice.  I use a rice cooker, which I love though I feel like I couldn’t make rice without it.  Sometimes I use white rice, though more often I use brown rice.  In any event I use short-grained rice.  With brown rice I use a ratio of 2:1, and add a little salt and a little canola oil or sesame oil.  I wash my rice also.

For the teriyaki sauce, I usually start with this recipe, though I’ve only recently started buying mirin.  Sometimes I’ll substitute some rice vinegar, or beer, or white wine.  Sometimes I’ll just use soy sauce and water for the liquids.  I mix it up with the sugars a bit, using more brown sugar, or maybe molasses, or even honey.  But if you don’t have ginger or garlic on hand, try it another night. 

I cut the chicken into bite-sized bits, using about a pound –pound and a half. I’ll use either straight thighs or a mix of thigh and breast meat.  I usually don’t marinate it for long, as little as 15 minutes. 

Meanwhile I’ll chop the veggies for steaming, usually just carrots and cabbage.  I use red cabbage, which costs a little more than green cabbage and perhaps not in the Japanese tradition, but I like using the anthocyanin-rich purple water that develops as a bonus pH indicator.  I get a nice steam going, and add the cabbage first, and a couple of minutes later the carrots.  Depending on how soft you like your vegetables, you could leave them for 4-8 minutes or so. I usually just test them with a fork after a few minutes.  Don’t let your water boil off, like I do, only too often. 

Meanwhile, I start the tastiest bit.  I add some canola oil and sesame oil to a sauce or deep fry pan.  I usually mix the two oils because canola is less unhealthy but sesame oil has that wonderful flavor.  Sometimes I start with onion, other times no onion.  If so I add the onion once the oil is hot, and when they turn translucent I usually add chopped button mushrooms.  Once the mushrooms are mostly cooked I add the chicken with the marinade and cook until done, about 7-10 minutes. 

In the bowl you should have mostly rice, less veggies, and then the chicken and sauce on top.  Enjoy!